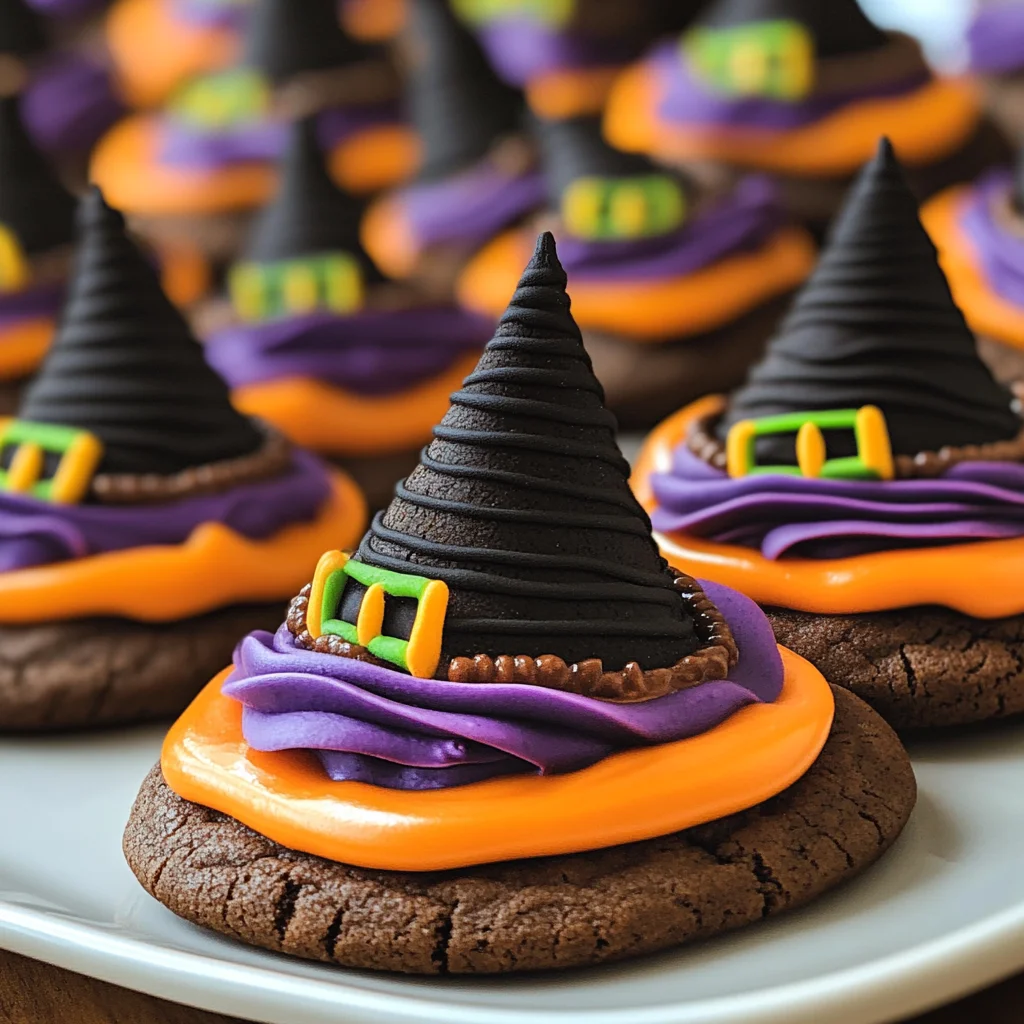
Halloween Witch Hat Cookies
These Halloween Witch Hat Cookies are a delightful treat that will enchant your Halloween festivities. Perfect for parties, school events, or just a fun family baking day, these cookies are not only visually striking but also incredibly tasty. With their chocolaty flavor and customizable design, they are sure to impress both kids and adults alike.
Why You’ll Love This Recipe
- Fun Activity: Baking these cookies is a great way to spend time with family and friends, especially kids who love to get creative in the kitchen.
- Customizable Design: You can personalize the witch hats with different colors and decorations, making each cookie unique.
- Chocolaty Goodness: The combination of cake and cookies creates a rich chocolate experience that will satisfy any sweet tooth.
- Perfect for Parties: These cookies are a standout treat on any Halloween table, adding flair and excitement to your dessert spread.
- Easy to Make: With simple steps and accessible ingredients, you’ll have these spooky sweets ready in no time.
Tools and Preparation
Before you start baking, gather the necessary tools to ensure a smooth process. Having the right equipment makes it easier to create these beautiful Halloween Witch Hat Cookies.
Essential Tools and Equipment
- Cupcake Cones Baking Rack
- Cookie Sheet
- Parchment Paper
- Decorating Bags (with tips)
- Knife
- Spatula
Importance of Each Tool
- Cupcake Cones Baking Rack: This tool holds your sugar cones securely while baking, ensuring they rise perfectly for your witch hats.
- Decorating Bags: Using bags with tips allows for precise icing application, giving your cookies a professional look.
- Parchment Paper: Lining your cookie sheet with parchment ensures easy removal of baked goods without sticking.
Ingredients
To make these enchanting Halloween Witch Hat Cookies, gather the following ingredients:
For the Cake Mix
- Favorite Cake Mix or Try Wilton’s Chocolate Cake Recipe
For the Cookies
- Store Bought Chocolate Cookies or Try This Recipe from Wilton
For the Icing
- Lemon Yellow Icing Color
- Black Color Mist Food Coloring Spray
- Rose Icing Colors Pink Food Coloring
- Violet Icing Color, Gel Food Coloring
- Golden Yellow Icing Color
- Orange Icing Color
- Creamy White Decorator Icing, 4 lb. Tub
For the Hats
- Sugar Cones
How to Make Halloween Witch Hat Cookies
Step 1: Prepare & Bake the Cones
- Prepare the cake mix according to your chosen recipe’s instructions.
- Place the cupcake cones baking rack on a cookie sheet.
- Insert sugar cones into the rack and fill each cone with about 2 tablespoons of cake batter.
- Bake and cool the cones as per the timing instructions in your recipe.
Step 2: Spray the Cones
- After cooling, trim any risen cake at the top of each cone with a knife if necessary.
- Place cones wide side down on parchment paper.
- Using Black Color Mist, spray each cone until fully coated.
- Allow them to dry for about 10 to 15 minutes.
Step 3: Tint the Icing & Prepare the Bags
- In two separate bowls, tint 1 cup of creamy white decorator icing orange and another cup purple by mixing violet and rose icing colors.
- Prepare two decorating bags with tip 2B for orange and purple icing respectively.
- Tint ¼ cup of creamy white decorator icing yellow using golden yellow and lemon yellow colors; place it in a bag with tip 3 attached.
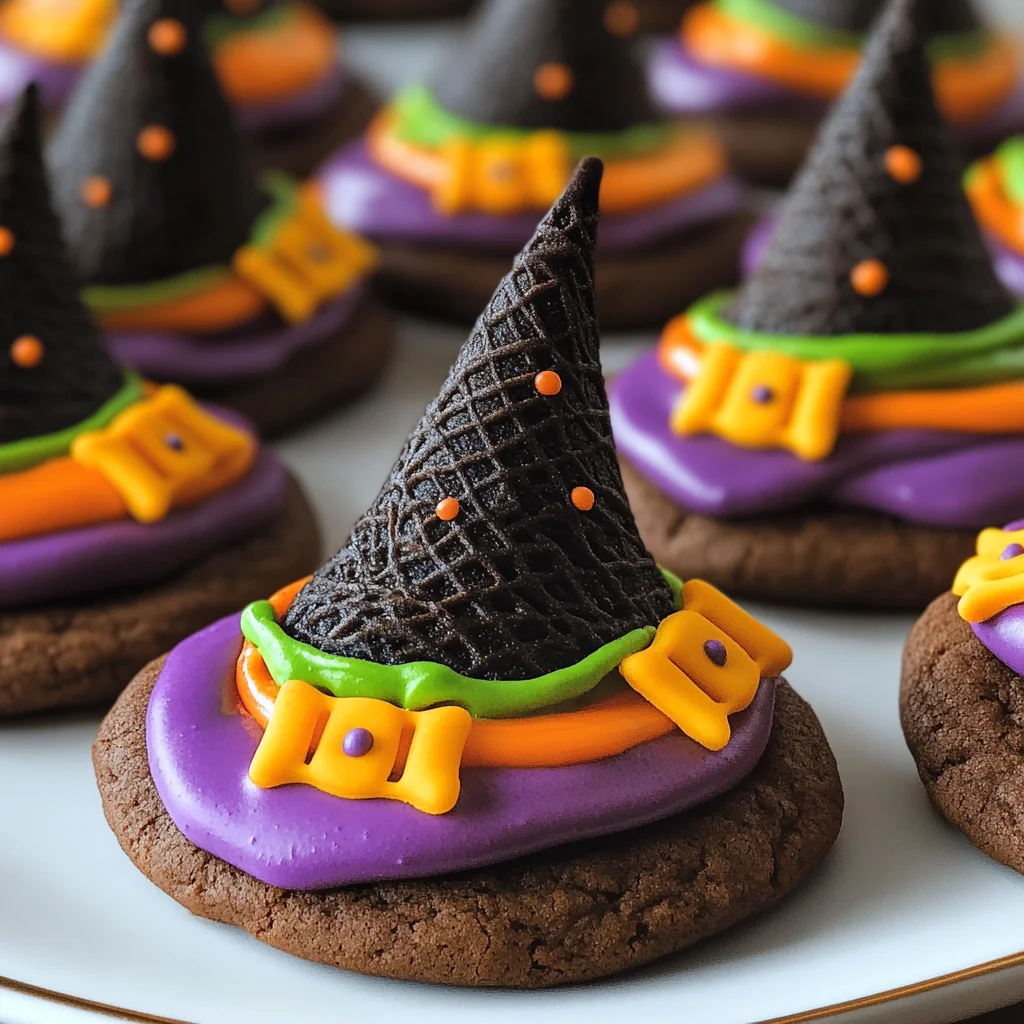
Step 4: Assemble the Witch Hats
- Pipe a small amount of orange icing in the center of each cookie to attach a cone on top.
- With smooth side facing out, pipe an icing band around half of the cones using orange icing; smooth it out with a spatula.
- Repeat this process using purple icing on the other half of cookies and cones.
- Allow all assembled cookies to set for about 15 to 20 minutes.
- Use yellow tinted icing in bag with tip 3 to pipe buckles around each hat band; let set for an additional 15 to 20 minutes before serving.
Enjoy these fun and festive Halloween Witch Hat Cookies!
How to Serve Halloween Witch Hat Cookies
These Halloween Witch Hat Cookies are a delightful addition to your spooky dessert table. With their fun design and vibrant colors, they can be served in various creative ways.
Display on a Festive Platter
- Arrange the cookies on a Halloween-themed platter for an eye-catching centerpiece. Add some fake spider webs or plastic spiders for extra flair.
Pair with Spooky Drinks
- Serve these cookies alongside themed drinks like pumpkin spice lattes or spooky smoothies. The flavors complement each other perfectly while enhancing the Halloween spirit.
Gift in Treat Bags
- Place individual cookies in clear treat bags tied with colorful ribbons. These make great party favors for guests to take home.
Create a Cookie Bar
- Set up a cookie bar where guests can mix and match their favorite Halloween treats. Include toppings, sprinkles, and other candies for extra fun.
Use as Cake Toppers
- For an added twist, use these cookies as toppers on cupcakes or cakes. They add a whimsical touch to any dessert while continuing the Halloween theme.
How to Perfect Halloween Witch Hat Cookies
To ensure your Halloween Witch Hat Cookies turn out perfectly every time, follow these helpful tips.
- Use fresh ingredients: Ensure that your cake mix and icing are fresh for the best taste and texture.
- Pipe carefully: Take your time when piping the icing to create clean lines and shapes on the hats.
- Let them set: Allow enough time for the icing to dry between steps; this will help maintain their shape and prevent smudging.
- Experiment with colors: Feel free to mix different shades of icing colors to personalize your witch hats further.
- Store properly: Keep any leftover cookies in an airtight container at room temperature to maintain freshness.
Best Side Dishes for Halloween Witch Hat Cookies
Pairing side dishes with your Halloween Witch Hat Cookies can enhance the overall experience. Consider these delicious options:
-
Pumpkin Soup
A warm, creamy pumpkin soup adds a savory contrast to sweet treats and is perfect for fall gatherings. -
Spooky Veggie Platter
Arrange colorful vegetables like carrots, bell peppers, and cucumbers in spooky shapes for a healthy yet festive option. -
Cheesy Ghost Toasts
Top slices of bread with cheese cut into ghostly shapes; they’re easy to prepare and add a playful touch. -
Witch’s Brew Salad
A mixed green salad with dark leafy greens topped with purple grapes offers both color and nutrition. -
Mummy Hot Dogs
Wrap hot dogs in crescent roll dough to resemble mummies, serving as a fun finger food that kids will love. -
Creepy Pasta Salad
Whip up a cold pasta salad using black olives and cherry tomatoes for an eerie yet tasty dish that complements desserts well. -
Candy Corn Fruit Cups
Layer yellow pineapple chunks, orange cantaloupe balls, and whipped cream in cups resembling candy corn—a sweet treat that’s also healthy! -
Ghostly Popcorn Balls
Make popcorn balls decorated with white chocolate and candy eyes; they’re easy to grab and enjoy alongside your cookies!
Common Mistakes to Avoid
Avoiding common mistakes will ensure your Halloween Witch Hat Cookies turn out perfectly. Here are some tips to keep in mind:
- Not measuring ingredients accurately: Precision is key in baking. Use a kitchen scale or measuring cups to ensure you have the right amount of each ingredient.
- Skipping cooling time: Allowing baked cones to cool properly helps prevent melting the icing. Patience here will lead to better results.
- Overfilling the cones: Fill sugar cones with just 2 tablespoons of batter. Overfilling can cause a mess and uneven baking.
- Using old icing colors: Check the expiration dates on your food colorings. Fresh colors yield brighter and more vivid designs for your cookies.
- Not piping evenly: Practice piping techniques before decorating the cookies. This will help achieve a professional look with your icing.
Storage & Reheating Instructions
Refrigerator Storage
- Store Halloween Witch Hat Cookies in an airtight container.
- They can last up to 5 days in the refrigerator.
Freezing Halloween Witch Hat Cookies
- Place cookies in a single layer in an airtight freezer-safe container.
- They can be frozen for up to 3 months.
Reheating Halloween Witch Hat Cookies
- Oven: Preheat to 350°F (175°C) and warm for about 5-7 minutes for best texture.
- Microwave: Heat one cookie at a time for about 10-15 seconds, being careful not to overheat.
- Stovetop: Gently warm cookies in a skillet over low heat for a few minutes, covered, to retain moisture.
Frequently Asked Questions
Here are some common questions regarding Halloween Witch Hat Cookies:
How can I customize Halloween Witch Hat Cookies?
You can customize these cookies by using different icing colors and toppings, such as sprinkles or edible glitter, to match your Halloween theme.
Can I use homemade cake mix?
Absolutely! Feel free to use your favorite homemade cake mix instead of store-bought options for a personal touch.
What if I don’t have sugar cones?
If sugar cones aren’t available, try using regular ice cream cones or even cupcakes baked in muffin tins as an alternative.
What is the best way to transport Halloween Witch Hat Cookies?
Keep them in a sturdy container lined with parchment paper. This prevents sticking and helps them stay intact during transport.
How long do these cookies last?
When stored properly, Halloween Witch Hat Cookies can last up to 5 days in the refrigerator or 3 months in the freezer.
Final Thoughts
These Halloween Witch Hat Cookies are not only fun to make but also allow for plenty of creativity when it comes to decorating. Perfect for parties or family gatherings, they can be customized with various colors and toppings. Encourage your little ones to join in on the fun and create unique designs that are sure to delight everyone!
Halloween Witch Hat Cookies
Create delightful Halloween Witch Hat Cookies that are sure to impress your guests! These whimsical treats combine rich chocolaty cookies with colorful icing to form enchanting witch hats, making them perfect for parties, school events, or family baking days. Not only are they visually striking, but they’re also incredibly tasty and customizable. Kids will love getting creative in the kitchen as they help decorate these festive desserts. With easy steps and simple ingredients, you’ll have a fun and spooky treat ready in no time!
- Prep Time: 20 minutes
- Cook Time: 15 minutes
- Total Time: 35 minutes
- Yield: Approximately 12 cookies
- Category: Dessert
- Method: Baking
- Cuisine: American
Ingredients
- Cake mix (store-bought or homemade)
- Chocolate cookies (store-bought or homemade)
- Sugar cones
- Creamy white decorator icing
- Lemon yellow icing color
- Black color mist food coloring spray
- Rose icing colors pink food coloring
- Violet icing color, gel food coloring
- Golden yellow icing color
- Orange icing color
Instructions
- Prepare the cake mix according to package instructions.
- Preheat your oven and place sugar cones upside down in a cupcake cone rack on a cookie sheet.
- Fill the cones with cake batter and bake until set. Cool completely.
- Trim any excess cake from the tops of the cones.
- Spray each cone with black edible mist and let dry.
- Tint your icing in various colors and fill decorating bags fitted with tips.
- Assemble by piping orange icing onto cookies to attach cones, then decorate with colored icing bands and buckles.
Nutrition
- Serving Size: 1 cookie
- Calories: 180
- Sugar: 12g
- Sodium: 120mg
- Fat: 6g
- Saturated Fat: 3g
- Unsaturated Fat: 2g
- Trans Fat: 0g
- Carbohydrates: 30g
- Fiber: 1g
- Protein: 2g
- Cholesterol: 20mg